Have you ever been in a flat tire situation and left stranded just because you don’t know what to do? Knowing how to change your car tire is a very important and necessary skill for yourself as a driver. In this article you will be guided on the easy step by step procedures on how to change a tire in case any situation arises.
Keep reading to find out
Step 1: Park in a Safe Place
For a starter, safety first. Ensure you get your car off the road if possible. You need to pull over or find a place away from the rush of traffic on the road. A parking lot would be an ideal place, however in case of road emergencies, slowly and carefully pull your car over to the side of the road. Also ensure you park on a levelled ground. A soft ground could make your car roll.
Leave your hazard lights on when on the side of the road, turn off the car, and apply your parking brake. When you are sure of your safety you can now move over to the next step.
Step 2: Get Your Tools
In order to change a tire, there are certain tools you need. Most of the important tools come with your car, however, you may need to buy others and add to your kit. It is advisable that you do this in advance, that is as soon as you get a car.
The following are tools you need to change your car tire:
- Car’s Owner Manual: The owner manual of every car usually comes with specifications that are useful while changing the tyre. You will find small but important details here, for example, the type of wrench that will fit the nuts and bolts of your car.
- A spare tire
- Jack
- Lug wrench or torque wrench
- Wheel wedges
- A portable tire inflator.
- A tire gauge
Step 3: Use the Wheel Wedge to Secure the Good Tires
Wheel wedges also called wheel chocks are sturdy material placed closely against the vehicle’s wheels to prevent accidental movement. Chocks are placed for safety in addition to setting the brakes. Bricks or large rocks can do the same job if you don’t have a chock. When you are done placing the wedges, you can now move to the next step.
Step 4: Remove Wheel Covers and Loosen Lug Nuts
If your tire has a wheel cover, you’ll need to carefully remove it before proceeding to lose the nuts. Then using the log wrench and socket, loose the lug nuts by turning anticlockwise. It is important to note that the lug nuts should not be loosened completely. It should be loosened slightly just to break its strength. You will have to exert force in doing this because the nuts are really tight.
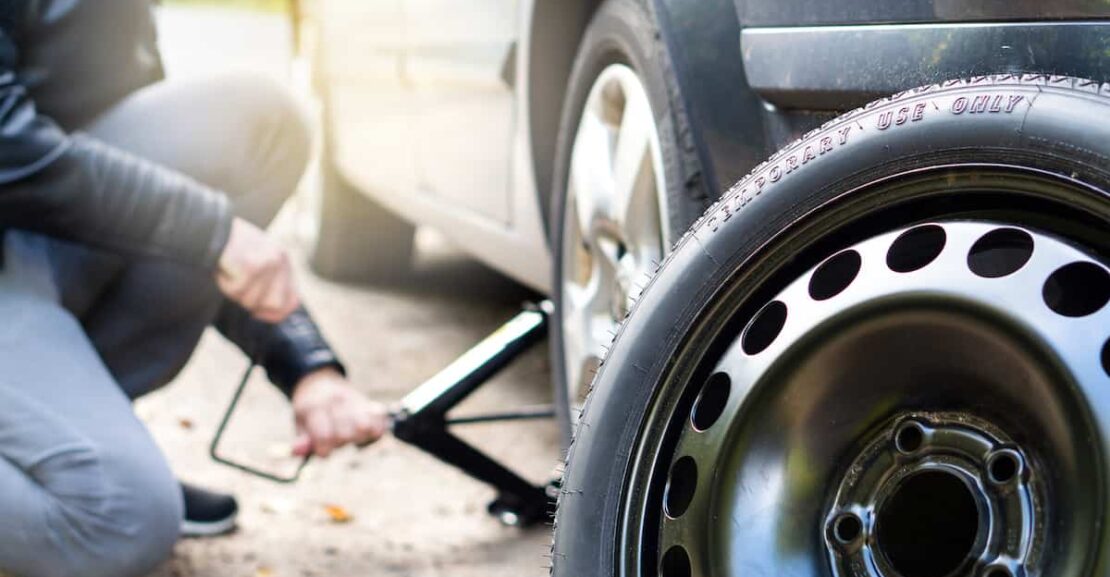
Step 5: Get Your Car Jacked Up
If you don’t know the correct location to place your jack, refer to your manual. It is important to know the correct location to place your jack so you don’t damage your vehicle’s undercarriage in any way.
Generally, the right point to place the jack is beneath the car just alongside the punctured tire. When you have located the jacking point, place a plank or wooden board to secure the jack firmly on the ground and keep it stable.
Then connect the jack to the jacking point and lift the car slowly until you see enough space to remove the tire. If you notice an imbalance or any instability, lower the car and secure the jack so it can be stable.

Step 6: Unscrew the Lug Nuts and Replace the Punctured Tire
Since you had earlier loosened the lug nuts, this time around, completely unscrew them. You do this with the help of a wrench. When you are done, Remove the tire. Pull it off the car straight and gently towards you. Next, insert the new tire gently. By aligning the rim with the lug bolts, insert the spare tire on the hub. Gently press down until you can see the lug bolts through the rim.
Step 7: Tighten the Lug Nuts
Put the wheel nuts back into place and tighten them as far as you can using your hand. Once they are all attached, double-check each one and tighten as much as you can. After lowering the car to the ground, you’ll use the wrench to tighten them.
Step 8: Lower the Vehicle and Tighten the Nuts Again
You’re almost done at this point. Now lower the vehicle with the jack. Do not let the weight of the car be entirely rested on the tire. Instead lower the car just so that the tires touch the ground slightly. Now using the wrench, retighten the lug nuts as much as possible.
You may have to use your full weight to push down the wrench to make it tighter.
Step 9: Replace the Wheel Cover
Now if your car tire had a wheel cover, ensure to replace it. Place it the same way you initially removed it.
Step 10: Fully Lower the Vehicle and Remove the Jack
Fully lower the car to the ground and remove the jack. Make sure to take everything with you when you remove the jack, including the wheel spanner, jack, wheel wedges, and anything else you may have used or removed. Replacing it in the boot
Ensure to check the pressure in the spare tire If you have a spare wheel, make sure it is properly inflated with a tire pressure gauge.Alternately, cautiously approach a gas station and utilise the gauge there. If necessary, inflate the tire to the recommended pressure, which is described in the manual.

Now you are good to go. You can safely get yourself and your vehicle back on the road. Don’t forget driving on the spare more frequently or for a longer period of time than the owner’s handbook advises could further harm your car.Temporary spare tires aren’t designed to travel far or fast. Until you can visit a tire technician, drive carefully. If your tire has to be repaired or needs to be replaced, a professional should be able to tell you.